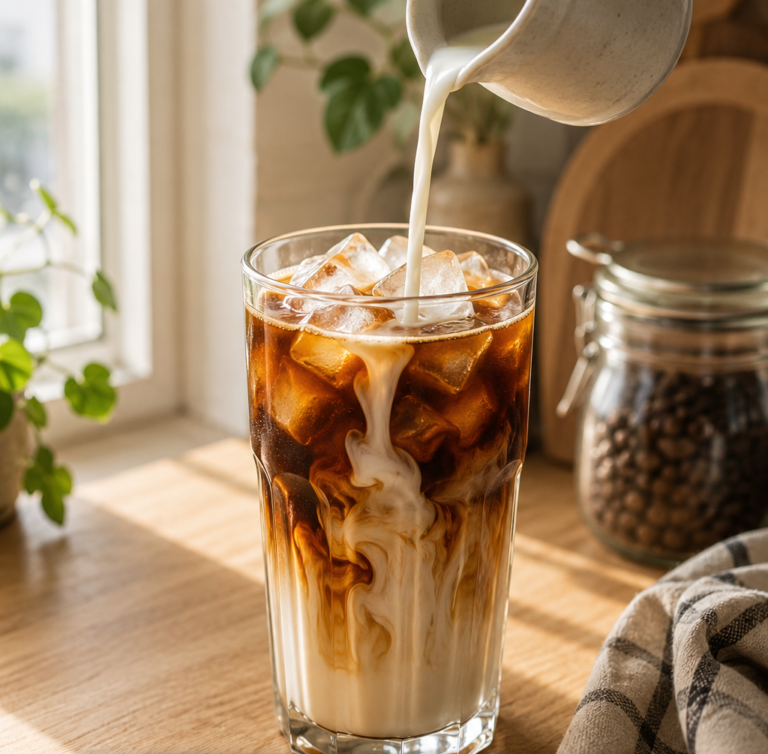
Cold brew is one of those things that sounds like it belongs firmly in the hands of a specialty coffee shop with an industrial filtration system and a chalkboard full of origins. In reality, you can make a seriously good batch at home with nothing more than a jar, some coffee, cold water, and a bit of patience. The results? Smooth, rich, barely bitter coffee that’s ready to drink all week.
As an Amazon Associate, I earn from qualifying purchases and sometimes recommend products from other sellers at no extra cost to you. For more details see my disclosure policy and privacy policy.
If you’ve been buying cold brew cans from the supermarket at £2–£3 a pop, this post will change your life — or at the very least, save you a fair amount of money over the summer. Here’s everything you need to know to make cold brew at home in the UK, from the basic method through to equipment upgrades and serving ideas.

What Is Cold Brew Coffee (and Why Is It Different)?
Cold brew is coffee brewed entirely in cold water over a long period — typically 12–18 hours in the fridge. That’s it. No heat involved at any stage.

The Coffee Chef Planner
Daily planning, journalling, and a proper coffee tasting log with a flavour wheel — 20 pages in one printable bundle.
Shop the planner →
Brewforge
A growing edit of coffee bar gear we’d genuinely want on our own counter, added to as we find things worth having.
Shop Brewforge →The reason it tastes so different from regular iced coffee (or hot coffee that’s been cooled down) comes down to what the water actually extracts from the grounds. Cold water pulls fewer of the acidic and bitter compounds that hot water brings out, which is why cold brew tends to taste smoother, slightly sweeter, and much gentler on the stomach. If you find regular coffee a bit harsh, cold brew is often easier to tolerate.
Cold Brew vs Iced Coffee — What’s the Actual Difference?
This is worth clearing up because the two terms get used interchangeably all the time. Iced coffee is hot-brewed coffee served over ice — it’s quick to make but can taste watery or sharp once the ice melts. Cold brew is brewed cold from the start, giving you a more concentrated, mellow result.
The trade-off is time. An iced coffee takes 10–20 minutes; cold brew takes 12–24 hours. But cold brew is almost entirely hands-off once you’ve combined the coffee and water, and you can make a large batch that keeps in the fridge for up to a week. For more on how the two stack up — including caffeine levels — this breakdown of cold brew vs iced coffee caffeine is worth a read.
What You Need to Make Cold Brew at Home
The beauty of the no-kit method is that you probably already own everything. Here’s what you’re working with:
- A container — a lidded jar, jug, bottle, or flask. A 1-litre mason jar works perfectly. Even a clean protein shaker will do the job.
- Ground coffee — medium to coarse grind (similar to what you’d use for a French press). More on grind size below.
- Cold, filtered water — a Brita-style filter jug is ideal. Tap water works, but filtered gives you a cleaner flavour.
- Something to strain through — a fine mesh sieve, a piece of muslin or cheesecloth, a paper coffee filter in a V60 or Chemex, or the filter basket from a cafetière.
If you already own a French press or an AeroPress, you’re in even better shape — both work beautifully for cold brew and take care of the straining step for you.

A Note on Grind Size
Grind size matters more than most people expect with cold brew. You want medium-coarse to coarse — roughly the texture of coarse sea salt. Go too fine and you’ll end up with a muddy, over-extracted brew that’s quite bitter (the opposite of what you’re going for). A coarse grind also makes straining much easier and produces a cleaner cup.
If you’re buying pre-ground coffee, look for anything labelled “French press grind” or “coarse grind” — that’ll do the job. For fresh grinding at home, finding the right coffee grinder for French press brewing covers the grind settings you need.
The Basic Cold Brew Recipe (Jar Method)
This is the simplest starting point — no special equipment required.
For a single glass:
- 20 g coarsely ground coffee
- 250 ml cold filtered water
For a larger batch (roughly 4–5 cups):
- 80–100 g coarsely ground coffee
- 1 litre cold filtered water
Method:
- Add the coffee grounds to your jar or container.
- Pour over the cold water and stir briefly to make sure all the grounds are wet.
- Put the lid on and place in the fridge.
- Leave for 12–18 hours. Fourteen to sixteen hours is a reliable sweet spot — long enough to get full flavour extraction without tipping into over-extraction territory.
- Strain through a fine sieve, muslin cloth, or paper filter into a clean bottle or jug.
- Serve over ice, diluted to taste if you’ve made a concentrate (more on ratios below).
That’s genuinely all there is to it. The fridge does the work while you sleep.
Getting the Ratios Right
Cold brew can be made either as a ready-to-drink brew or as a concentrate that you dilute before serving. The ratio you use determines which one you end up with.
- Ready to drink — use around 1:8 to 1:11 (coffee to water by weight). So 80 g coffee to 800 ml water gives you a brew you can pour straight over ice.
- Concentrate — use around 1:4 to 1:5. So 100 g coffee to 400 ml water gives you a strong base that you dilute 1:2 or 1:3 with water or milk when serving.
Concentrate is particularly handy if fridge space is tight — you make a smaller volume and dilute as you go. A standard cold brew concentrate serve is roughly 30 ml of concentrate topped up with 120 ml of cold water or milk over ice.
Making Cold Brew with a French Press
If you own a cafetière, you’ve already got one of the best cold brew setups available. The built-in plunger acts as your filter, and the large capacity is great for batch brewing.
For a French press batch:
- 90 g coarsely ground coffee
- 700 ml cold water (for a standard 8-cup cafetière)
Method:
- Add the grounds to the cafetière.
- Pour over the cold water and stir gently.
- Place the lid on with the plunger pulled up — don’t press down yet.
- Put the cafetière in the fridge for 12–16 hours.
- When ready, press the plunger down slowly and pour into a bottle or jug. For a cleaner result, you can pass it through a paper filter or fine sieve as well.
The French press is ideal for bigger batches — you can scale up to 250 g coffee and 1 litre of water and get concentrate equivalent to around 16 cups once diluted. For a brilliant all-round coffee bar setup, the French press earns its place on any coffee station — our guide to setting up a home coffee bar covers how to organise your equipment for maximum ease of use.
Making Cold Brew with an AeroPress
The AeroPress isn’t the obvious choice for cold brew — it’s designed for fast hot brewing — but it’s a solid option for a small single-serve batch or if you want to experiment.
The most common approach is the inverted method with room-temperature or cold water: set up the AeroPress inverted, add medium grind coffee and cold water, stir, pop the cap on, and leave it in the fridge for 12–24 hours. When ready, flip and press into a cup over ice. You’ll get 1–2 cups at a time.
The AeroPress also works for flash-brew iced coffee — technically a different method, but worth knowing. You brew hot and strong directly onto a cup full of ice, which chills and dilutes simultaneously. You get a brighter, more aromatic result in about 5 minutes. It’s not cold brew, but it’s a great option when you don’t have 12 hours to spare.
| French Press Cold Brew | AeroPress Cold Brew | |
|---|---|---|
| Batch size | 500 ml–1 litre+ | 1–2 cups |
| Effort | Measure, stir, forget | More hands-on; small capacity |
| Body | Heavier; can be filtered further | Cleaner cup with paper filters |
| UK availability | Cafetières in every supermarket | Common online and in coffee shops |
How to Serve Your Cold Brew
Cold brew is versatile, and once you’ve got a batch in the fridge, you can do a lot with it. Here are some of the most popular ways to drink it:
- Straight over ice — pour your ready-to-drink cold brew or diluted concentrate over a glass of ice. Simple, and it shows off the flavour properly.
- UK iced latte — cold brew over ice topped up with semi-skimmed, oat, or barista-style alt milk. Oat milk is particularly good here — the natural sweetness plays nicely against the cold brew’s smoothness.
- With a citrus garnish — a wedge of orange or lemon on the side sounds unusual but works brilliantly. UK specialty roasters often suggest it for lighter, fruitier beans.
- Cold brew tonic — pour cold brew concentrate over ice and top with tonic water. This is a real polariser but it’s having a moment in UK specialty cafés right now.
If you want more inspiration for café-style drinks to make at home, the complete iced coffee guide covers everything from iced americanos to Japanese ice method brewing.
The Best Coffee to Use for Cold Brew
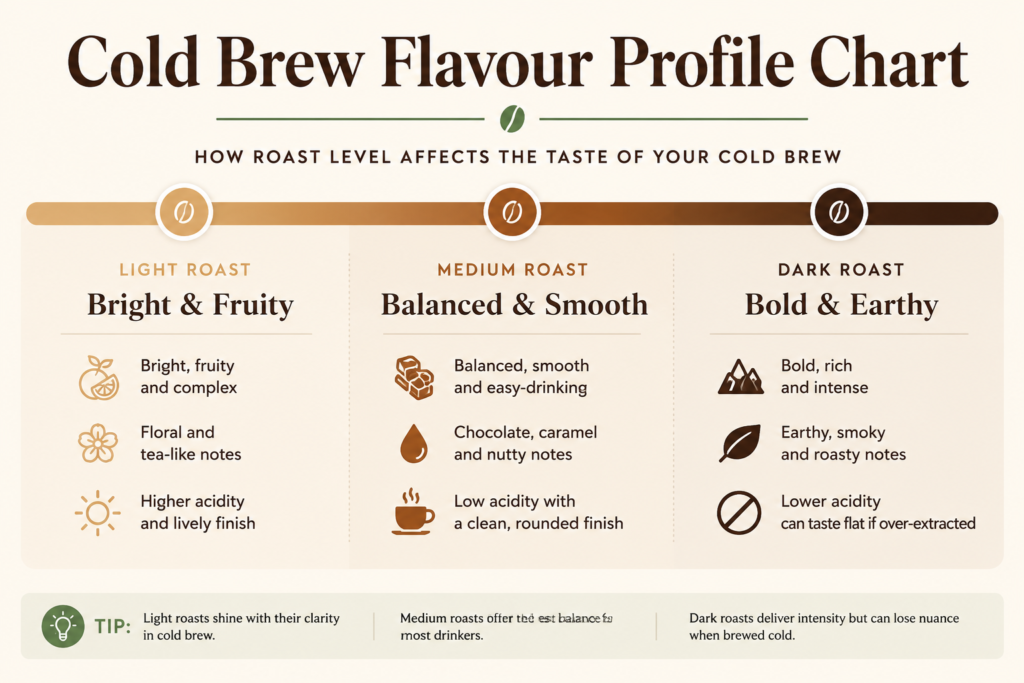
Almost any coffee works for cold brew, but some roast levels perform better than others. Medium roasts are a great starting point — they tend to have more nuance and complexity when cold-extracted than dark roasts, which can taste flat or slightly harsh without the heat to balance them. Light roasts produce very bright, fruity results that some people love and others find a bit sour.
If you want some specific UK-roasted recommendations, this guide to the best coffee for cold brew pulls together seven solid options available here in the UK, across different flavour profiles and price points.
When to Upgrade to a Dedicated Cold Brew Maker
The jar method is perfectly good, and plenty of people make excellent cold brew in a mason jar indefinitely. But if you find yourself making cold brew every week, a dedicated cold brew bottle or maker does make the process tidier and less faff.
Cold brew bottles are the most popular upgrade — a glass or plastic bottle with a built-in filter basket and a tight-sealing stopper. You add your grounds to the basket, pour cold water in, and the bottle sits straight in the fridge door. No separate straining required. Most 1-litre bottles make around 4–5 cups per batch.
Cold brew systems like the Toddy or Hario Mizudashi are better for large-batch brewing. The Toddy uses a felt filter and produces a very clean, very smooth concentrate. The Mizudashi is simpler — a glass jug with a mesh filter — and is widely available in the UK through coffee retailers.
If you’re browsing for cold brew gear, coffee accessories, and more, take a look at the Coffee Chef shop for a curated round-up.
Storage and Shelf Life
Once strained, cold brew keeps well in the fridge in a clean, sealed bottle or jar. Flavour is at its best in the first three to four days, but it’s still perfectly drinkable up to a week later. After that, it can start to taste flat or slightly off — at which point it’s time to make a fresh batch.
A few things that help with storage:
- Use a clean container — any traces of milk or previous coffee in the bottle can affect flavour quickly
- Keep the lid on tightly — cold brew picks up fridge smells if left open
- Label it with the date so you know where you are
Start Simple, Scale Up
The hardest part of cold brew is resisting the urge to drink it before it’s ready. The process itself is as simple as coffee gets — combine, wait, strain, serve. Start with the basic jar method using coffee you already have at home, see whether you prefer ready-to-drink strength or concentrate, and go from there.
Once you’ve got your ratios dialled in, cold brew is one of the lowest-effort ways to have brilliant coffee ready to go all week. And at a fraction of the cost of buying it ready-made, it’s one of the most satisfying things to have mastered in your home coffee routine.
If you’re building out a proper setup at home, the home coffee bar accessories guide covers the kit that’s actually worth buying — including the storage and serving pieces that make cold brew brewing that much more enjoyable.
Continue Your Coffee Journey
- Iced Coffee at Home — The Complete UK Guide — all the iced coffee methods in one place, from cold brew to Japanese ice method
- Cold Brew vs Iced Coffee Caffeine: What’s the Difference? — a closer look at how the two methods compare on flavour, strength, and caffeine
- Best Coffee for Cold Brew: 7 Top UK Picks — which beans work best for cold extraction
- How to Set Up a Home Coffee Bar — build a proper coffee station at home
- Best Coffee Bar Accessories UK — the kit worth investing in for a home coffee setup
Have you tried making cold brew at home? Drop a comment and let us know your method — jar, French press, AeroPress — and how you like to serve it. We’d love to know what works for you.
Want more home coffee recipes, buying guides, and honest UK reviews delivered straight to your inbox? Sign up for The Coffee Chef newsletter and we’ll keep you in the loop.